|
|
|
|
|
|
 |
|
|
 |
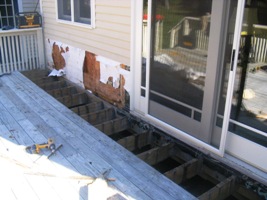
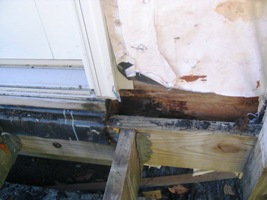
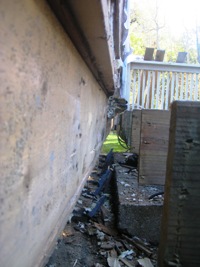
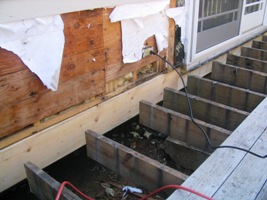
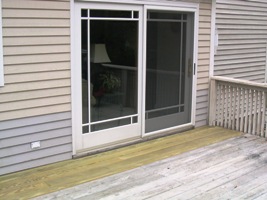
Mattis Deck Rot On this particular project, poor flashing installation to this patio door created a rot problem leading to an "ant problem". The ants have since been eliminated, however the rot remains until now. This job will involve; removing the first layer of KD 2x10 framing, then a 3/4" layer of plywood (which was installed to compensate for the outside corner trim "a mistake in my opinion") and the 2x8 PT ledger board which the deck joist are attached to. I found no flashing whatsoever attached to this deck except for Ice & water shield under the door sill. Once the rotted material has been removed and new material set in place, I'll be installing a flashing system which I design to keep the deck off the house by 1/2 an inch using 1/4" strips of aluminum attached to the back of the ledger. Then a 16" white aluminum flashing with drip edge will be placed against the wall and will essentially tuck under the first course of siding by 4 inches making this deck virtually water proof against the house.
One bit of advice to pass along regarding any deck installation would be to always make sure your new deck is set 1- 7" step below the top of the door sill. This eliminate any water issues when most people rarely remove that 3-4" snowfall, which essentially slowly melts and ends up seeping into and under your door sill.
Decking now stripped and ready for demo Existing rot at the right side corner
Existing plywood rotted right through As well as the 1st 2x10 KD frame
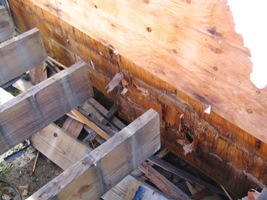
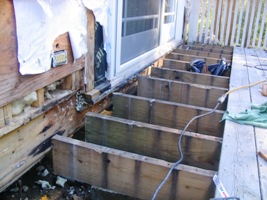
Rotted wood has been removed leaving a 5" space View from the deck surface after rot removal
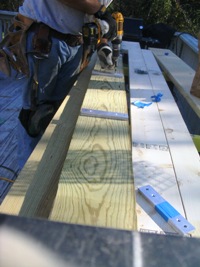
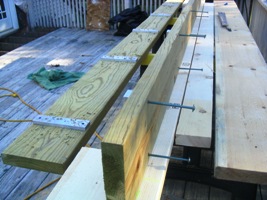
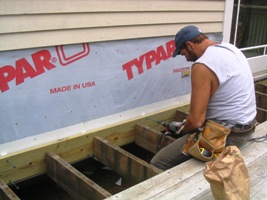
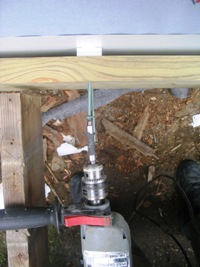
Applying 1-1/2" x 7" Aluminum strips 6" Lag screws will be used to secure the ledger
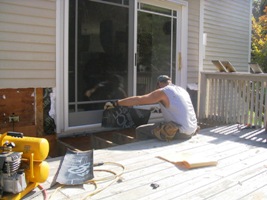
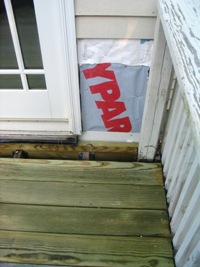
New 2 x 10 framing sub-ledger now in place Applying ice & water shield to exterior plywood
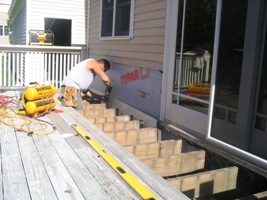
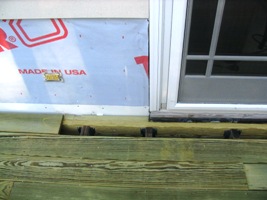
Installing 16" drip edge New PT ledger screwed in place
Overhead look of the 1/2" space between ledger and wall Decking now in place
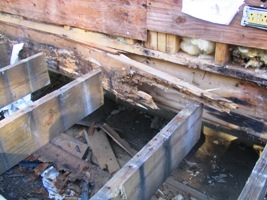
Rotting hole before repairs View of repairs after
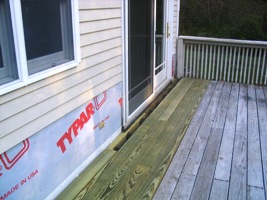
With decking just about done, were now ready for siding Job is now completed
|